- Quote :
- Polygon Edit is a built in tools in Cosmic break under 'paint' that allow players to change their head models, with restriction to size and poly points
About me:Im one of the very few players that plays with the poly editing, guide was created hoping to see more works by ENCB players and requested from many players
u can see my work here :
https://cosmicbreak.forumotion.com/t2182-ket-s-original-wtf-skin-updated-21-1If you are reading this, you probably
A) Want to make a awesome head but no clue where to start
B) Read this becoz theres nth better to do
C) A guide by Ket!! OMFG!#$!
D) For the troll!
Assuming that u are either A or C, continue reading.....
However to do this it require:
-> Cosmic break player
-> Understand the in game 'paint' tool
-> You have the patience, it took mins to hours to create something
-> Understand polygons is a plus, but not necessary as im noob on it either
However if anyone manage to get any external model software to work, please share it =3
_____________________________________________________________________________
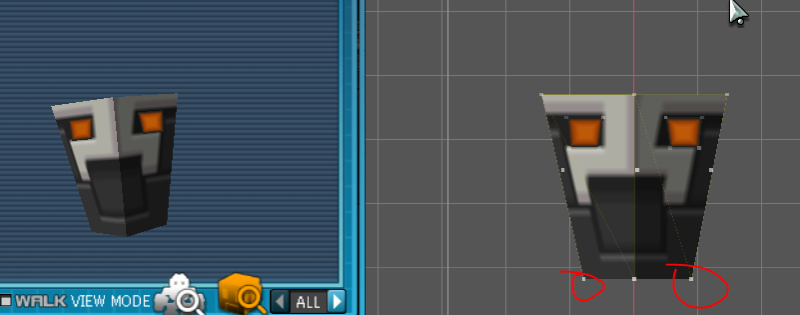
For our 1st example, we will use Cacpetus HD making it into a flower basket as it offer one of the most basic model. Below is the pic of the screenshot of the volunteer u will see in game:
AS THIS IS JUST THE BASIC LESSON, YOU SHOULD ONLY USE THE DEFAULT CAMERA VIEW TO PREVENT CONFUSION! (left right top down front back. In fact i only use default view for most of my work)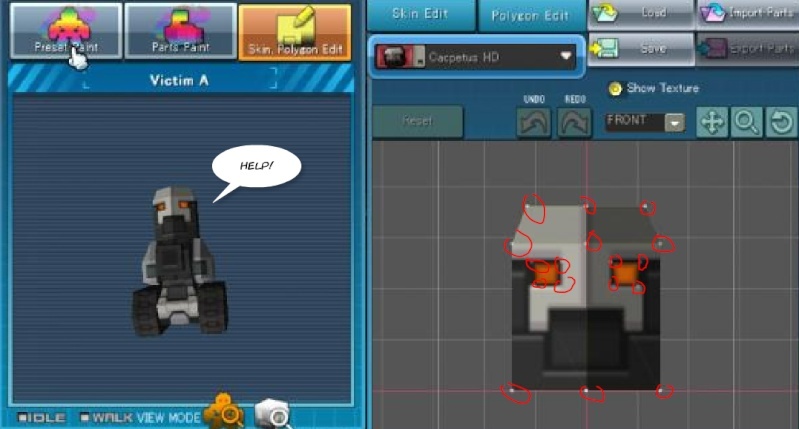
The red circles are the poly points u see in the FRONT view. It is very important to know the poly points in the respective view position
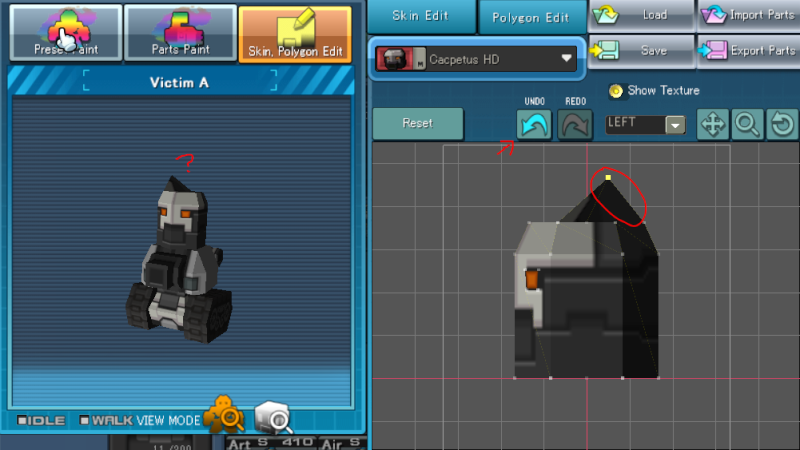
When u switch the view, u notice the poly points change as well:

__________________
*Theory*2 Poly points form a line, 3 form a triangle, 4 form a rectangle and so on. You must understand that each poly point are connected to at least one other.
__________________
So how do you know what points to edit? this is where the left camera come in handy. When u select a point and move it, the changes will appear in the left as well. If it is not the point u want to edit, just click redo and click another point.
Before your start, it helps to understand the HD and know what are the parts that are'detachable' Meaning points that can be remove without affecting the overall HD. Having more detachable points allows the model to contain more details as those can be turn to other stuff without affecting the 'general' poly. (An example would be the floating cross on my pedograve)
Most of the time identify detachable points require trial and error or guessing, but i can tell you for our cacpetus HD the eyes are detacble ;3
So lets say, you want to turn the head into a Squarish flower basket. (Making circles are complex and its for advance lesson)
So, 1st we going to create a concave. Select all the top layer of polys and drag it down:

You will see that a 'hole' is created on the left screen.
Select all the polys, and move the head upward
To make the basket look nicer drag select the polys at the btm and drag it a little towards the center in FRONT OR BACK view
Do the same with the LEFT OR RIGHT view

Drag all the btm poly and push them upwards

You will notice a mysterious black box appear, thats the box that appear when u use capectus bullet attack. However we will use it as a stand instead

If you rotate the view, u also notice alot of weird rendering appear. This is becoz of the 'layers' of the poly overlap with another 'layer'. This usually occur with bad moving of polys, or unless u wanted the effect on purpose.
To resolve it, simple move the poly points to somewhere so it doesnt overlap. For this situation, this is easiest done in BOTTOM view. ( Solving layers issue is very common and require lots of trial and error. The error here can actually prevented with some changes in the previous step. Can you find out what it is?)
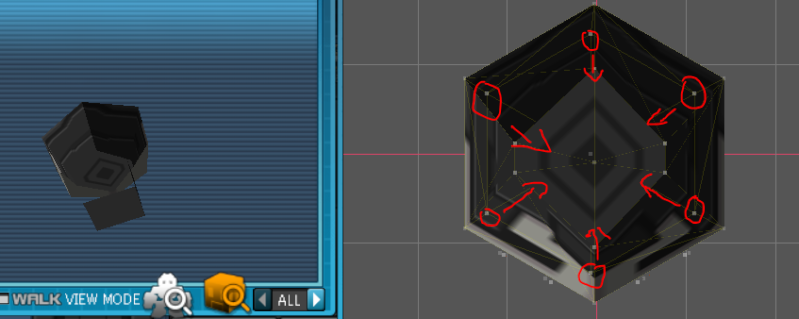
All the poly points with red circle need to be move towards center
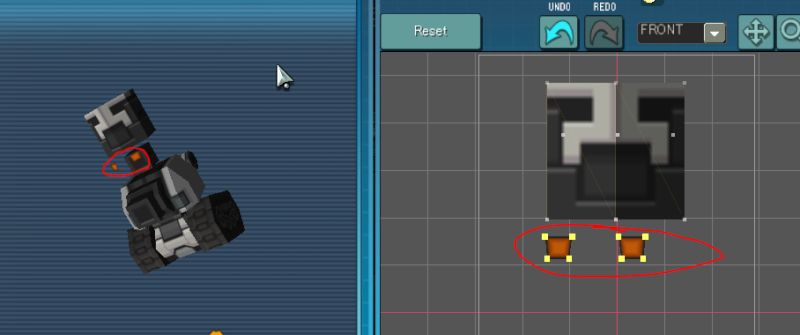
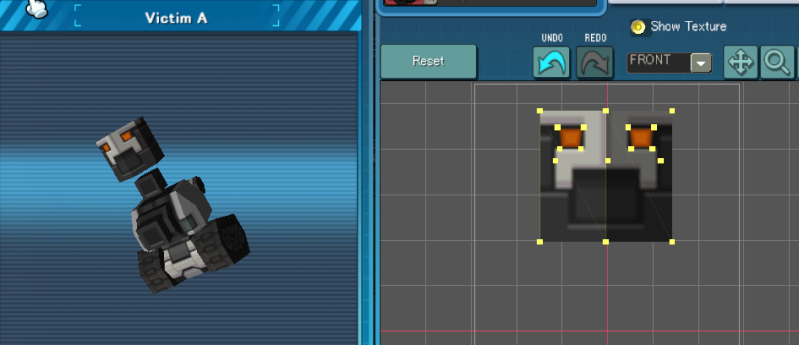
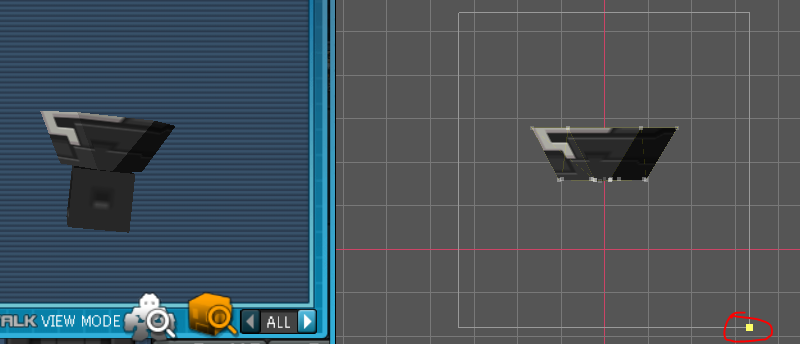
Now to remove the eyes, which are excess in this situation, u either drag it all the way to a corner or you hide it in a 'fat body'. As we doesnt have a 'fat body' here, drag it to a corner so it will be disappear to human eyes.
Now all that left is coloring:

Now just need to throw in the flower ribbon and shift the poly a bit to make it better match, heres the finish product:

__________________________________________________________________________________________________
And this marks the end of the guide =3
Conclusion-> Use the left screen to identify the points needed
-> Try to understand how each points affect the overall model
-> Important to identify the 'detachable' 1st
-> Move 'excess' to corner of screen to make it disappear
-> Poly edits requires lotsa trial and error, so i recommend stick to the few models as you know the limits and flexibility provided. After cacetus a good HD to practise is Pararoid or Cyberoid.
The way use to make the basket is actually not the most efficient way, I hope you can find out why :p
Any problems regarding to editing u can leave a post here or find me in game. If you wish to look at the basket before u try it u can find me too

If theres a demand for more advance stuff like how i created my pepen or ramen stall, i might make the advance guide


![[Administrator]](https://i.servimg.com/u/f59/14/69/23/87/admin_10.png "[Administrator]")


